
Two-Component Foam Kits Use Guidelines
ALWAYS review and follow the directions provided in your foam kit. The below instructions are a general overview, meant to accompany the reference photos. ENSURE you follow all safety precautions including wearing protective eyewear and gloves.
Prepare the Area
- Make sure area to receive foam is clean and dry.
- Ensure the area has adequate ventilation. If flow-through ventilation isn’t possible, wear respiratory gear and ensure you can exit the area quickly if fumes become overwhelming.
- Ensure appropriate ambient temperature. Check application temperature in each product's Technical Data Sheet.
Set-up the Foam System
- Rock the box or tanks to agitate the product thoroughly.
- Ensure foam is brought to a temperature between 70-90°F before dispensing. Failure to ensure proper temperature may affect product performance.
- Tear open the top of box along perforated lines (Figure 1).
- Remove instructions and accessories bag (Figure 2).
- Make sure gun is “OFF” by pushing trigger lock into gun body.
- Attach hoses. Connect the red hose to the red cylinder (unit A), connect the white hose to thewhite tank (unit B), inserting hoses into carton holes. Tighten hoses with wrench provided.
- Close cartons, unlock gun and spray into waste container to ensure chemicals distribute evenly and equally from both hoses.
- Lubricate o-ring (petroleum jelly is fine).
- Select spray nozzle (yellow for fan pattern/flat areas, transparent for high-velocity linear spray/cracks and voids). Align slots on nozzle with notch on gun barrel and push/twist nozzle clockwise to lock in place (Figure 3).
- Spray again into waste container to ensure product is mixing properly. The foam should be off-white in color (not brown or white – which indicates one unit is not working properly)
( Figure 4). Call our customer service group at 800-325-6180 if you believe your foam kit isn't spraying properly. - Foam is now ready to apply.
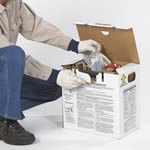
Figure 1
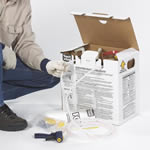
Figure 2
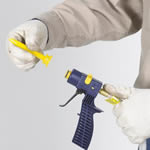
Figure 3
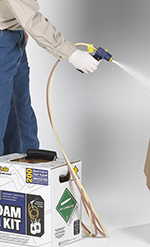
Figure 4